Back to Self Study
Motorcycle Study Guide
Based on Kurikulum Pendidikan Pemandu — Modul Motosikal 2021. Click on each chapter to expand the study material.
1Chapter 1: License Types & Process
Types of Driving Licenses
- LDL (Learner Driving License / Lesen Memandu Percubaan) — Issued after passing the Part 1 theory exam. Valid for 2 years. Allows supervised practice riding.
- PDL (Probationary Driving License / Lesen Memandu Percubaan P) — Issued after passing Part II and Part III practical tests. Valid for 2 years. You must display the P plate at all times.
- CDL (Competent Driving License / Lesen Memandu Kompeten) — Full license issued after completing the 2-year probationary period without suspension.
- Vocational License (Lesen Vokasional) — Required for commercial vehicle operators such as bus and taxi drivers.
Minimum Age
- Minimum age for motorcycle license: 16 years old
- License class: B2 (motorcycle up to 250cc), B (motorcycle above 250cc, minimum age 18)
Licensing Process
- Register at an approved driving institute (Institut Memandu / IM)
- KPP01 — Theory Class (6 hours): Road safety, traffic rules, road signs
- Pass Part 1 Exam — Computer-based theory test (50 questions, 42 correct to pass)
- Obtain LDL — Learner license valid for 2 years
- KPP02 — Practical Training: Riding skills on circuit and road
- Pass Part II — Circuit riding test (on-course maneuvers)
- Pass Part III — Road riding test (on public roads with examiner)
- Obtain PDL — Probationary license with P plate for 2 years
- After 2 years — Convert to CDL (Competent Driving License)
Important Rules for P License Holders
- Must display P plate on the motorcycle — you can get a JPJ-approved P/L sticker from Umake.my
- Accumulating 20 demerit points results in PDL cancellation
- Must re-register and retake all tests if PDL is cancelled
- Zero tolerance for alcohol — no alcohol at all for P license holders
2Chapter 2: Road Signs — Danger Signs
Characteristics
- Shape: Diamond (rotated square) · Colors: Yellow background, black symbols · Purpose: Warn of hazards ahead
Key Danger Signs
 Uneven Road
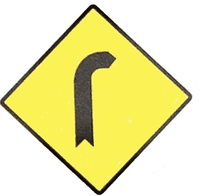 Curve Right
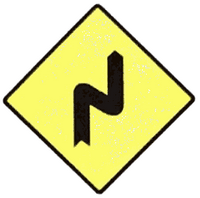 Double Curve
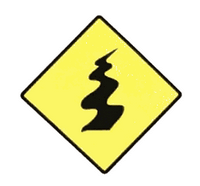 Winding Road
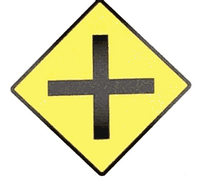 Crossroads
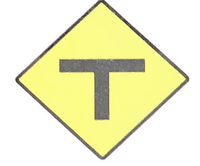 T-Junction
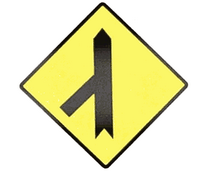 Junction Left
 Railway Gate
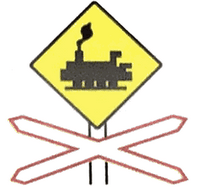 Level Crossing
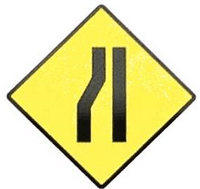 Road Narrows
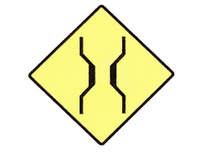 Narrow Bridge
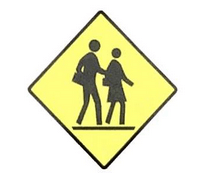 School Zone
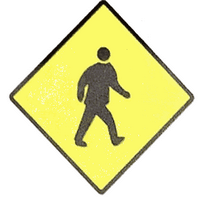 Pedestrian Crossing
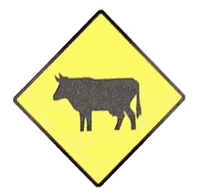 Animal Crossing
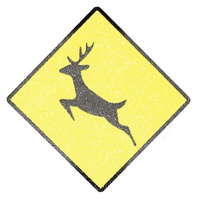 Wild Animals
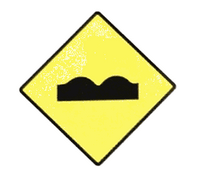
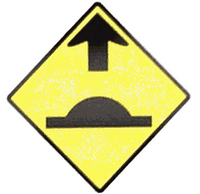 Speed Hump
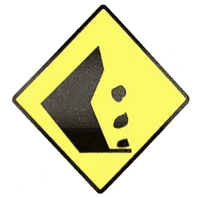 Falling Rocks
 Slippery Road
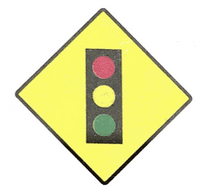 Traffic Lights
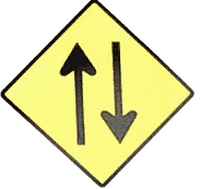 Two-Way Traffic
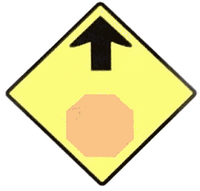 Stop Ahead
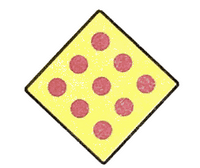 Obstacles
Tips
- Always reduce speed when you see a danger sign
- Scan ahead for hazards and be ready to stop
- Increase following distance in danger zones
3Chapter 3: Road Signs — Prohibition Signs
Characteristics
- Shape: Circular · Colors: Red border, white background · Purpose: Actions that are forbidden
Key Prohibition Signs
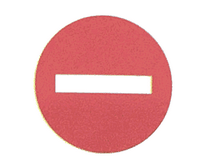 No Entry
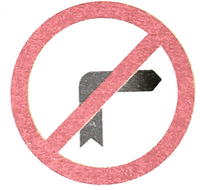 No Right Turn
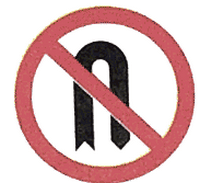 No U-Turn
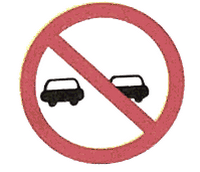 No Overtaking
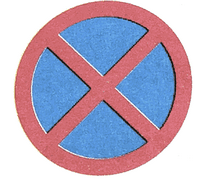 No Stopping
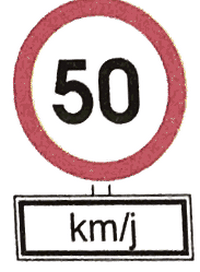 Speed Limit
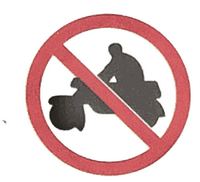 No Motorcycles
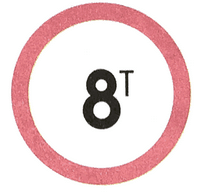 Weight Limit
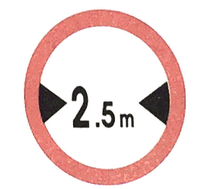 Width Limit
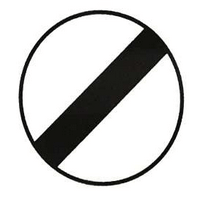 End of Restriction
Key Rules
- Red diagonal line through a symbol = prohibited
- Speed limits apply until the next speed sign or end-of-restriction sign
- Violations carry demerit points and fines
4Chapter 4: Road Signs — Mandatory Signs
Characteristics
- Shape: Circular · Colors: Blue background, white symbols · Purpose: Actions you must follow
Key Mandatory Signs
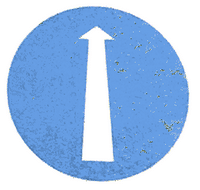 Go Straight
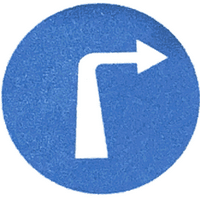 Turn Right Only
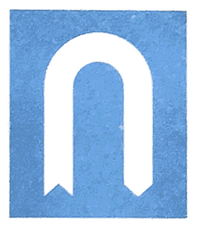 U-Turn
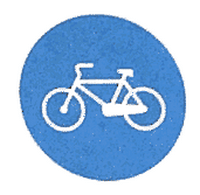 Bicycle Lane
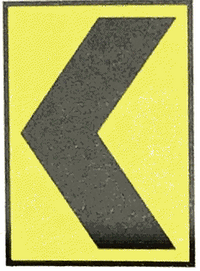 Keep Left
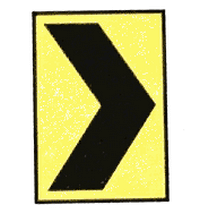 Keep Right
Key Rules
- Blue circular signs are instructions, not suggestions — you must obey them
- Failing to follow mandatory signs is a traffic offense
- They override general road rules at specific locations
5Chapter 5: Road Signs — Information & Temporary Signs
Information Signs
Shape: Rectangular · Colors: Blue or green background, white text/symbols
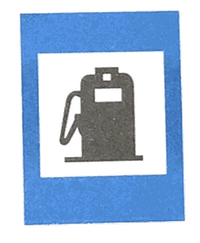 Petrol Station
 Health Clinic
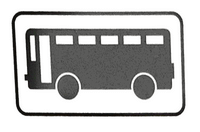 Bus Stop
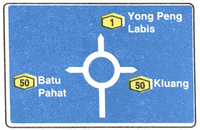 Roundabout Info
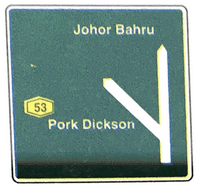 Highway Direction
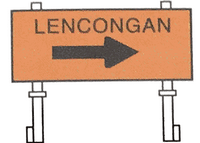 Detour
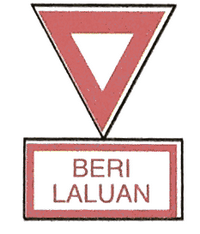 Give Way
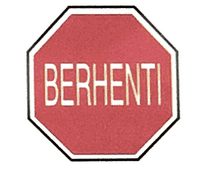 Stop
StopTemporary Signs
Shape: Diamond or rectangular · Colors: Orange/amber background, black text
 Detour
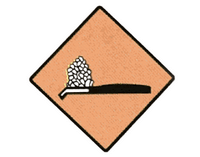 Road Work
Key Rules
- Temporary signs override permanent signs when both are present
- Always reduce speed in construction zones
- Fines are typically doubled in work zones
6Chapter 6: Safe Riding Rules
Journey Planning
- Plan your route before riding
- Check weather conditions
- Ensure your motorcycle is in good condition before departure
- Allow extra time for unfamiliar routes
The CITO Concept (Hazard Identification)
- C — Concentrate: Keep full attention on the road. Avoid distractions.
- I — Identify: Spot potential hazards early — other vehicles, pedestrians, road conditions.
- T — Think: Assess the risk and decide on the safest course of action.
- O — Organize: Execute your plan — change speed, position, or direction as needed.
Safe Following Distance
- Maintain at least a 2-second gap behind the vehicle in front
- In wet conditions, increase to 4 seconds
- At higher speeds, increase the distance further
- How to measure: Pick a fixed point. When the vehicle ahead passes it, count "one thousand and one, one thousand and two." You should not reach the point before finishing.
Overtaking Rules
- Only overtake when it is safe and legal
- Check mirrors and blind spots before overtaking
- Signal your intention before moving out
- Ensure there is enough space to return to your lane
- Never overtake at bends, junctions, pedestrian crossings, or where prohibited by signs
- Do not overtake when visibility is limited
Road Priority — Visual Examples
Study these junction scenarios to understand who has right of way:
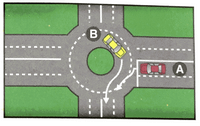 Roundabout Priority
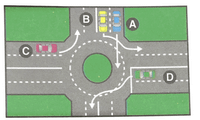 Roundabout Lanes
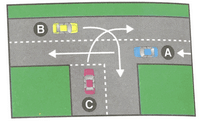 T-Junction Priority
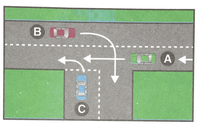 Junction Priority
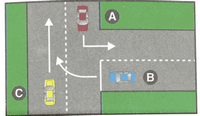 Right of Way
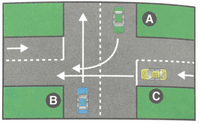 Intersection Rules
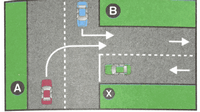 Turn Priority
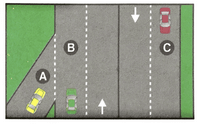 Lane Position
Key Signs for Safe Riding
Give WayStopNo OvertakingSpeed LimitBlind Spot Awareness
- Motorcycles are smaller and harder for other drivers to see
- Avoid riding in the blind spots of larger vehicles (trucks, buses)
- Position yourself where you can be seen in other drivers' mirrors
- Always do a head check (shoulder check) before changing lanes
Carrying Passengers and Cargo
- Only carry passengers on a motorcycle designed for two
- Passengers must wear a helmet
- Do not carry loads that affect balance or visibility
- Ensure cargo is securely fastened
- Adjust riding speed when carrying a passenger — braking distances increase
Mirrors and Signals
- Check mirrors regularly — every 5 to 8 seconds
- Signal before changing direction or lane, not during
- Cancel your signal after completing the maneuver
- Use hand signals if indicators are not working
7Chapter 7: Riding in Various Conditions
Riding in Rain
- Reduce speed significantly — roads are most slippery in the first 10 minutes of rain
- Increase following distance — braking distances double or triple on wet roads
- Use headlights — even in daytime rain, turn on your lights so others can see you
- Avoid sudden braking or sharp turns
- Avoid riding through puddles — they may hide potholes
- Watch for oil slicks, painted road markings, and metal surfaces — these become extremely slippery
- Use both brakes gently and progressively
Related Signs
Slippery RoadRoad HazardsUneven RoadSpeed HumpRiding at Night
- Use headlights — mandatory from 7:00 PM to 7:00 AM
- Reduce speed — your visibility range is limited to the area lit by your headlights
- Keep your headlight lens clean
- Use low beam when following another vehicle or when oncoming traffic approaches
- Wear reflective or bright clothing
- Ensure your tail light and reflectors are working
- Be extra cautious at intersections — it is harder to judge distances at night
Riding in Traffic Congestion
- Stay patient and avoid aggressive weaving between vehicles
- Maintain a safe distance even at low speeds
- Watch for car doors opening suddenly
- Be visible — position yourself where drivers can see you
- Avoid filtering through very tight gaps between vehicles
Urban Roads
- Watch for pedestrians, especially near bus stops and shops
- Be alert for vehicles pulling out of parking spaces or side roads
- Follow lane markings strictly
- Be prepared for frequent stops
Rural Roads
- Watch for animals crossing the road
- Roads may be narrower with no shoulder
- Be cautious of slow-moving agricultural vehicles
- Road surfaces may be uneven or have gravel
Different Road Surfaces
- Gravel or loose surfaces: Reduce speed, avoid sudden steering or braking
- Speed humps: Slow down before the hump, not on it
- Wet leaves or mud: Treat as a slippery surface — reduce speed
- Painted lines and metal covers: Can be slippery when wet — avoid riding on them
8Chapter 8: Vehicle Maintenance
Pre-Ride Inspection
Before every ride, perform a quick check of your motorcycle. A well-maintained motorcycle is safer and more reliable.
Brakes
- Check both front and rear brake levers for proper resistance
- Brakes should engage firmly without pulling to one side
- Check brake fluid level regularly
- Replace brake pads when worn
Tires
- Minimum tread depth: 1 mm
- Check tire pressure before riding — refer to the manufacturer's recommended pressure
- Inspect for cracks, bulges, or embedded objects
- Replace tires when tread is worn or damaged
- Under-inflated tires affect handling and increase fuel consumption
- Over-inflated tires reduce grip and traction
Lights
- Headlight: Check both high beam and low beam are working
- Tail light: Must be visible from the rear
- Brake light: Must illuminate when either brake is applied
- Turn signals: Check all four indicators are functioning
- Replace burnt-out bulbs immediately
Horn
- Must be in working condition at all times
- Used to alert other road users of your presence
- Test before every ride
Mirrors
- Both side mirrors must be fitted and properly adjusted
- Clean mirrors provide better rear visibility
- Replace cracked or broken mirrors
Chain
- Check chain tension — should have about 20-30mm of slack
- Lubricate the chain regularly
- A loose chain can come off; a tight chain can damage the sprocket
Engine Oil
- Check oil level using the dipstick or sight glass
- Change oil at intervals recommended by the manufacturer
- Low oil can cause engine overheating and damage
Coolant
- For liquid-cooled motorcycles, check coolant level regularly
- Never open the radiator cap when the engine is hot
Battery
- Check battery terminals are clean and tight
- Ensure the battery holds charge — a weak battery may fail to start the engine
9Chapter 9: Safety Equipment
Helmet
- Wearing a helmet is mandatory by law for both rider and pillion passenger
- Must be SIRIM-approved (look for the SIRIM certification label)
- Must fit snugly — not too tight, not too loose
- Full-face helmets provide the best protection
- Replace helmet after a significant impact or every 5 years
- Fasten the chin strap properly every time
- Penalty for not wearing a helmet: fine and demerit points
Reflective Vest
- Highly recommended, especially for night riding
- Makes you visible to other road users
- Bright or fluorescent colors increase daytime visibility
Gloves
- Protect hands from injury in a fall
- Improve grip on the handlebars
- Protect against wind, rain, and cold
Proper Footwear
- Wear closed-toe shoes or boots
- Shoes should cover the ankles for protection
- Avoid riding in slippers or sandals — they provide no protection and can slip off the foot peg
Eye Protection
- Use a helmet visor or riding goggles
- Protects eyes from dust, insects, rain, and wind
- Tinted visors should not be used at night
- Keep visor clean for clear visibility
Protective Clothing
- Long sleeves and long pants reduce injury severity in a fall
- Avoid loose clothing that can get caught in the motorcycle chain or wheels
- Riding jackets with padding offer additional impact protection
10Chapter 10: KEJARA Demerit System
What is KEJARA?
KEJARA (Skim Kejara) is the demerit point system used by JPJ (Road Transport Department) to track traffic offenses. Points accumulate on your driving record when you commit traffic violations.
Consequences by License Type
- PDL (P License) — 20 points: License is cancelled. You must re-register and retake all tests from the beginning.
- CDL (Full License) — 40 points: License is suspended for 6 months.
- CDL — 60 points: License is suspended for 12 months.
- CDL — 80 points or more: License is revoked. Must retake all tests.
Common Offenses and Demerit Points
- Speeding (exceeding limit by 1-25 km/h): 5 points
- Speeding (exceeding limit by 26-50 km/h): 10 points
- Speeding (exceeding limit by more than 50 km/h): 15 points
- Running a red traffic light: 10 points
- Using a mobile phone while riding: 10 points
- Not wearing a helmet: 5 points
- Dangerous or reckless riding: 15 points
- Riding under the influence of alcohol/drugs: 20 points
- Failing to stop after an accident: 15 points
- Riding without a valid license: 10 points
- Overtaking on double lines: 10 points
- Not obeying traffic signs: 5 points
Signs Commonly Violated
Speed LimitTraffic LightNo OvertakingNo EntryHow to Check Your Demerit Points
- Visit the JPJ website or counter
- Use the MyJPJ mobile application
- Points reset only after the suspension or revocation period ends
Reducing Risk
- Always follow traffic rules and road signs
- Drive within the speed limit
- Never ride under the influence
- Attend road safety courses if available — some programs may reduce points
11Chapter 11: Traffic Lights & Signals
Traffic Light Colors
- Red light: You must stop behind the stop line. Do not enter the junction.
- Amber (yellow) light: Prepare to stop. Do not enter the junction unless you are too close to stop safely.
- Green light: You may proceed if the way is clear. Check for pedestrians and other vehicles before moving.
Traffic Light Sequence
The standard traffic light sequence in Malaysia is:
- Red → Red + Amber (get ready) → Green (go) → Amber (prepare to stop) → Red (stop)
Flashing Lights
- Flashing red light: Treat as a STOP sign — you must come to a complete stop, then proceed only when it is safe.
- Flashing amber light: Proceed with caution — slow down and check for hazards before continuing.
Green Arrow Signals
- A green arrow means you may go only in the direction the arrow points.
- Other directions are still controlled by red — do not proceed in any other direction.
- Give way to pedestrians and vehicles already in the junction.
When Traffic Lights Are Not Working
- Treat the junction as an uncontrolled junction.
- Give way to traffic from your right.
- Slow down, check all directions, and proceed only when safe.
- If a traffic police officer is present, follow their signals instead.
Pedestrian Crossing Lights
- When the pedestrian light is green, pedestrians have the right of way — you must stop.
- A flashing green pedestrian light means pedestrians should finish crossing, and drivers should prepare to move.
- Always check for pedestrians even after the light changes in your favor.
Motorcycle Tips at Traffic Lights
- Do not filter dangerously to the front of the queue at traffic lights.
- Position yourself where you are visible to other drivers.
- Avoid stopping in the blind spot of large vehicles (trucks, buses).
- When the light turns green, check both sides before moving — some vehicles may run the red light.
12Chapter 12: Speed Limits
Standard Speed Limits in Malaysia
- Residential areas / school zones: 30 km/h
- Town / built-up areas: 50 km/h
- State roads (jalan negeri): 60–80 km/h
- Federal roads (jalan persekutuan): 90 km/h
- Highways / expressways: 110 km/h (cars); motorcycles may have lower limits on certain highways
Posted Speed Signs
- Speed limits can be changed by signs — always follow the posted speed limit sign.
- A speed limit sign applies from the point where it is displayed until the next speed limit sign or an end-of-restriction sign.
- Temporary speed limit signs (orange background) in construction zones override permanent signs.
Adjusting Speed Below the Limit
- The speed limit is the maximum, not a target — drive according to conditions.
- Bad weather (rain, fog): Reduce speed significantly below the limit. Visibility and grip are reduced.
- Heavy traffic: Match the flow of traffic and maintain a safe following distance.
- School zones: Slow down and watch for children, especially during school hours.
- Construction zones: Obey reduced speed limits and watch for workers on the road.
Penalties for Speeding
- Exceeding the speed limit by 1–25 km/h: Fine + 5 demerit points
- Exceeding by 26–50 km/h: Higher fine + 10 demerit points
- Exceeding by more than 50 km/h: Maximum fine + 15 demerit points
- Repeat offenders may face license suspension.
- Speed cameras (AES) are used on many highways and federal roads.
Motorcycle-Specific Considerations
- Motorcycles are more vulnerable at high speeds — wind resistance and stability decrease.
- Some highways restrict motorcycles to the left lane or prohibit them entirely.
- Always ride at a speed that allows you to stop within the distance you can see ahead.
13Chapter 13: Accident & Emergency Procedures
Immediate Steps After an Accident
- Stop immediately — do not flee the scene. Hit and run is a serious criminal offense carrying heavy penalties including imprisonment.
- Turn on your hazard lights to warn other road users.
- Place a warning triangle behind your vehicle — 50 meters on a normal road, 100 meters on a highway.
- If possible, switch off the engine to reduce the risk of fire.
Calling for Help
- Call 999 for police, ambulance, or fire brigade.
- Call 112 — universal emergency number (works even without a SIM card).
- On highways, use the emergency phone if available, or call the highway operator.
- Provide your location, number of injured persons, and nature of the accident.
Helping the Injured
- Do not move injured persons unless there is immediate danger such as fire or explosion.
- Moving an injured person incorrectly can worsen spinal or neck injuries.
- Provide first aid if you are trained — control bleeding, keep the person calm, and maintain airways.
- Do not remove a motorcyclist's helmet unless they are not breathing.
Exchanging Information
- Exchange the following with all parties involved:
- Full name and IC number
- Driving license details
- Insurance information
- Vehicle registration number
- Take photos of the damage, road conditions, and vehicle positions.
Police Report
- You must make a police report within 24 hours of the accident.
- This is required for insurance claims and legal purposes.
- Failure to report is an offense.
Minor Accidents
- If the accident is minor and vehicles can be moved, move them to the side of the road to avoid blocking traffic.
- On highways, move to the emergency lane and stand behind the barrier for safety.
- Never stand on the road or highway to inspect damage.
14Chapter 14: Effects of Alcohol & Drugs
How Alcohol Affects Riding
- Alcohol slows reaction time — you take longer to respond to hazards.
- Alcohol impairs judgment — you may take unnecessary risks.
- Alcohol reduces coordination — steering, braking, and balance are all affected.
- Alcohol causes blurred vision and difficulty judging distances and speed.
- Even small amounts of alcohol affect your ability to ride safely.
Legal Limits in Malaysia
- The legal blood alcohol concentration (BAC) limit is 0.08% (80 mg per 100 ml of blood).
- Even below the legal limit, alcohol affects driving ability and you can still be charged if you ride dangerously.
- P license holders: Zero tolerance — no alcohol at all.
Penalties for Drunk Riding
- First offense: Fine of up to RM2,000 and/or imprisonment up to 6 months.
- Repeat offense: Fine of up to RM4,000 and/or imprisonment up to 12 months.
- License suspension or revocation.
- 20 demerit points under the KEJARA system.
- If an accident causes death while under the influence — imprisonment up to 15 years.
Effects of Drugs on Riding
- Illegal drugs (cannabis, methamphetamine, etc.) severely impair riding ability.
- Prescription medications — some cause drowsiness, dizziness, or slow reactions. Always read medication labels.
- If a medication label warns about operating machinery or driving, do not ride.
- Combining medications with alcohol multiplies the impairing effects.
Fatigue and Drowsy Riding
- Fatigue is as dangerous as drunk riding — it causes microsleeps and slow reactions.
- Signs of fatigue: frequent yawning, heavy eyelids, drifting across lanes, difficulty concentrating.
- If tired: stop and rest. Do not rely on coffee, loud music, or opening windows.
- Plan long journeys with regular rest breaks — at least every 2 hours.
Motorcycle-Specific Risks
- Balance is critical on a motorcycle — alcohol destroys your sense of balance.
- A car may stay on the road even if the driver is impaired, but a motorcycle will fall.
- Never ride a motorcycle after consuming alcohol — the consequences are even more severe on two wheels.
15Chapter 15: Traffic Police Hand Signals
Authority of Traffic Police
- When a traffic police officer is directing traffic, their signals OVERRIDE traffic lights and signs.
- You must always obey police signals, even if they contradict traffic lights.
- Disobeying a police officer's signals is a traffic offense.
Key Hand Signals
- Officer facing you with palm raised (hand up): You must STOP. This is the same as a red light for you.
- Officer's side facing you with arm extended horizontally: You may proceed. Traffic from the officer's front and back must stop.
- Officer beckoning you (waving towards themselves): Move forward — the officer is directing you to proceed.
- Officer raising one hand after you have been allowed to proceed: Stop — the officer is changing the traffic flow.
How to Respond
- Slow down when approaching an officer-directed junction.
- Watch the officer carefully and be ready to stop or proceed as directed.
- Do not sound your horn impatiently at an officer-directed junction.
- If unsure of the officer's signal, slow down or stop rather than guessing.
When Police Override Traffic Lights
- If the traffic light is green but the officer signals you to stop — you must STOP.
- If the traffic light is red but the officer signals you to proceed — you may GO.
- The officer's judgment takes priority because they can see hazards or situations that the automated traffic lights cannot.
Tips for Motorcyclists
- Ensure the officer can see you — motorcycles are smaller and may be overlooked in heavy traffic.
- Make eye contact with the officer before proceeding.
- Follow the officer's signals smoothly — avoid sudden acceleration or braking.
Tip: After studying all chapters, test your knowledge with the practice questions in Section A (Road Signs), Section B (Rules), and Section C (KEJARA).